Sales Representative List
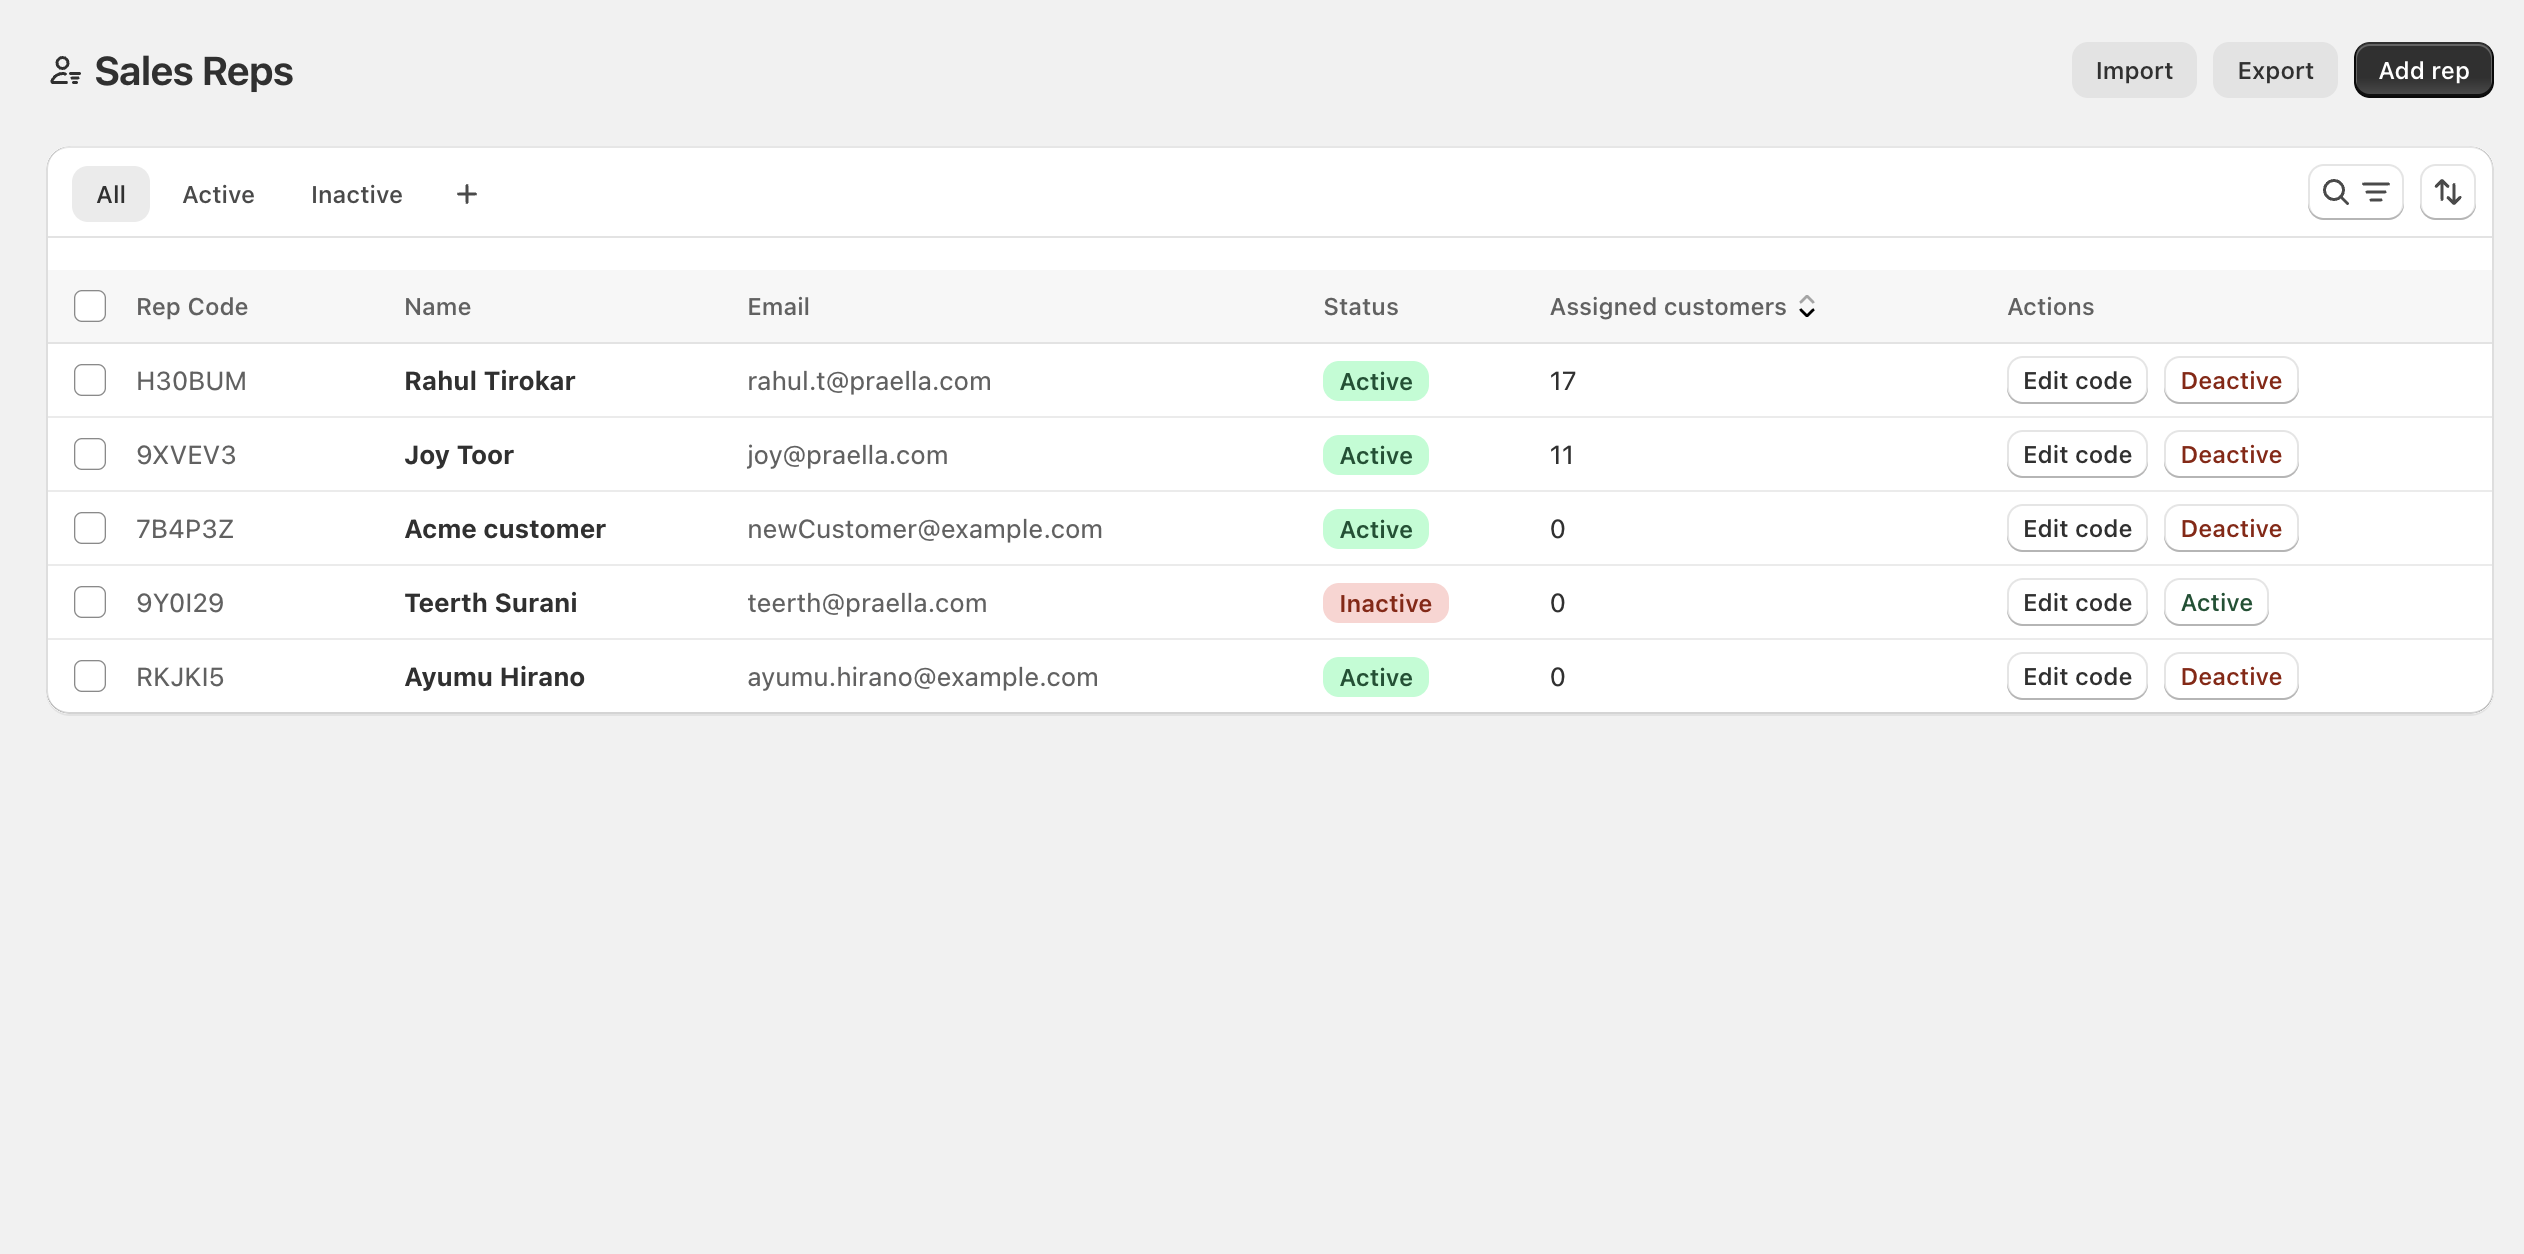
Go to Shopify Admin → Apps → B2B Plus → Sales reps to open the list — the home screen for all reps. The page header shows Import, Export, and Add rep as its primary actions.
In this guide:
- Sales Representative List Overview
- Edit Sales Representative Code
- Activate or Deactivate Sales Representatives
- Import Sales Representatives
- Export Sales Representatives
Sales Representative List Overview
| Column | What it shows |
|---|---|
| Rep Code | The rep's unique code, or an em dash if none is set |
| Name | Display name from the Shopify customer record |
| Login email | |
| Status | Active or Inactive, shown as a colored badge |
| Assigned customers | Count of customer-level assignments (sortable) |
| Actions | Edit code, plus Deactive or Active depending on current status |
- Sales Representative Name — the rep's display name, taken from their underlying Shopify customer record.
- Sales Representative Code — the short storefront-facing code, or blank until one is generated or set.
- Email — the same address the rep uses to log in as a Shopify customer.
- Assigned Customers — a live count of that rep's customer-level assignments; sorting by this column surfaces the busiest or emptiest reps quickly.
- Status — Active (green badge) or Inactive (red/pink badge).
For search and status tabs, see Searching Sales Representatives and Filtering Sales Representatives.
Edit Sales Representative Code
A rep code is a short identifier (letters and numbers) that reps may use on the storefront. Codes must be unique across the shop.
Update the Sales Representative Code directly from the list: click Edit code on a rep's row to open a modal where you can Generate code (creates a random unique code) or type/change the code manually.
Rules: 3–20 characters; letters A–Z and digits 0–9 only (stored as uppercase); must not duplicate another rep's code.
Rep code changes are recorded in the rep's Timeline on their detail page.
Activate or Deactivate Sales Representatives
Change the status from the listing page: each row's Actions column shows Deactive when the rep is currently Active, or Active when the rep is currently Inactive — click it to flip the status (a confirmation is required before the change is applied).
Reactivate inactive sales representatives: use the same row action (now labeled Active) on the Inactive tab, or bulk-select rows and use the bulk action bar to reactivate several reps at once.
Status can also be changed from the rep's own detail page using its Deactive/Active button.
Import Sales Representatives
Bulk import sales representatives: click Import on the list page, upload a .csv file (max 5 MB), and follow the on-screen guidelines — use the sample file when possible.
Supported import format: email is required on every row, and rows sharing the same email are grouped into one rep. Use the Assign Company, Assign Location, and Assign Customer columns for assignments — one numeric Shopify ID per row, with additional rows under the same email for more assignments. Rep Code is optional but must be unique if provided. For new emails, Shopify can create and invite the customer, and Rep Name is optional in that case.
The import runs in the background; progress appears on the list page, and the list refreshes automatically once processing finishes.
Import is for sales rep records only — not products, SKUs, or inventory.
Export Sales Representatives
Click Export, confirm the export, and a CSV downloads with all sales reps and their assignment data. Use the export as a backup or as a starting template for bulk edits — export, edit the CSV, then re-import.