Creating a Sales Representative
In this guide:
- Overview
- Option 1: Select an Existing Shopify Customer
- Option 2: Invite a New Customer as a Sales Representative
Overview
When to Create a Sales Representative
Whenever a staff member, existing buyer, or new hire needs to sell on the store's behalf and manage assigned B2B accounts.
Available Creation Methods
There are two ways to add a rep, both starting from the same Add sales representative dialog (opened via Add rep, top right of the Sales reps list):
- Turn an existing Shopify customer into a rep
- Invite someone new who doesn't have an account yet
You cannot add someone who is already a sales rep — search the main list to find them instead.
Option 1: Select an Existing Shopify Customer
Use this when the person is already a customer in Shopify but not yet a sales rep.
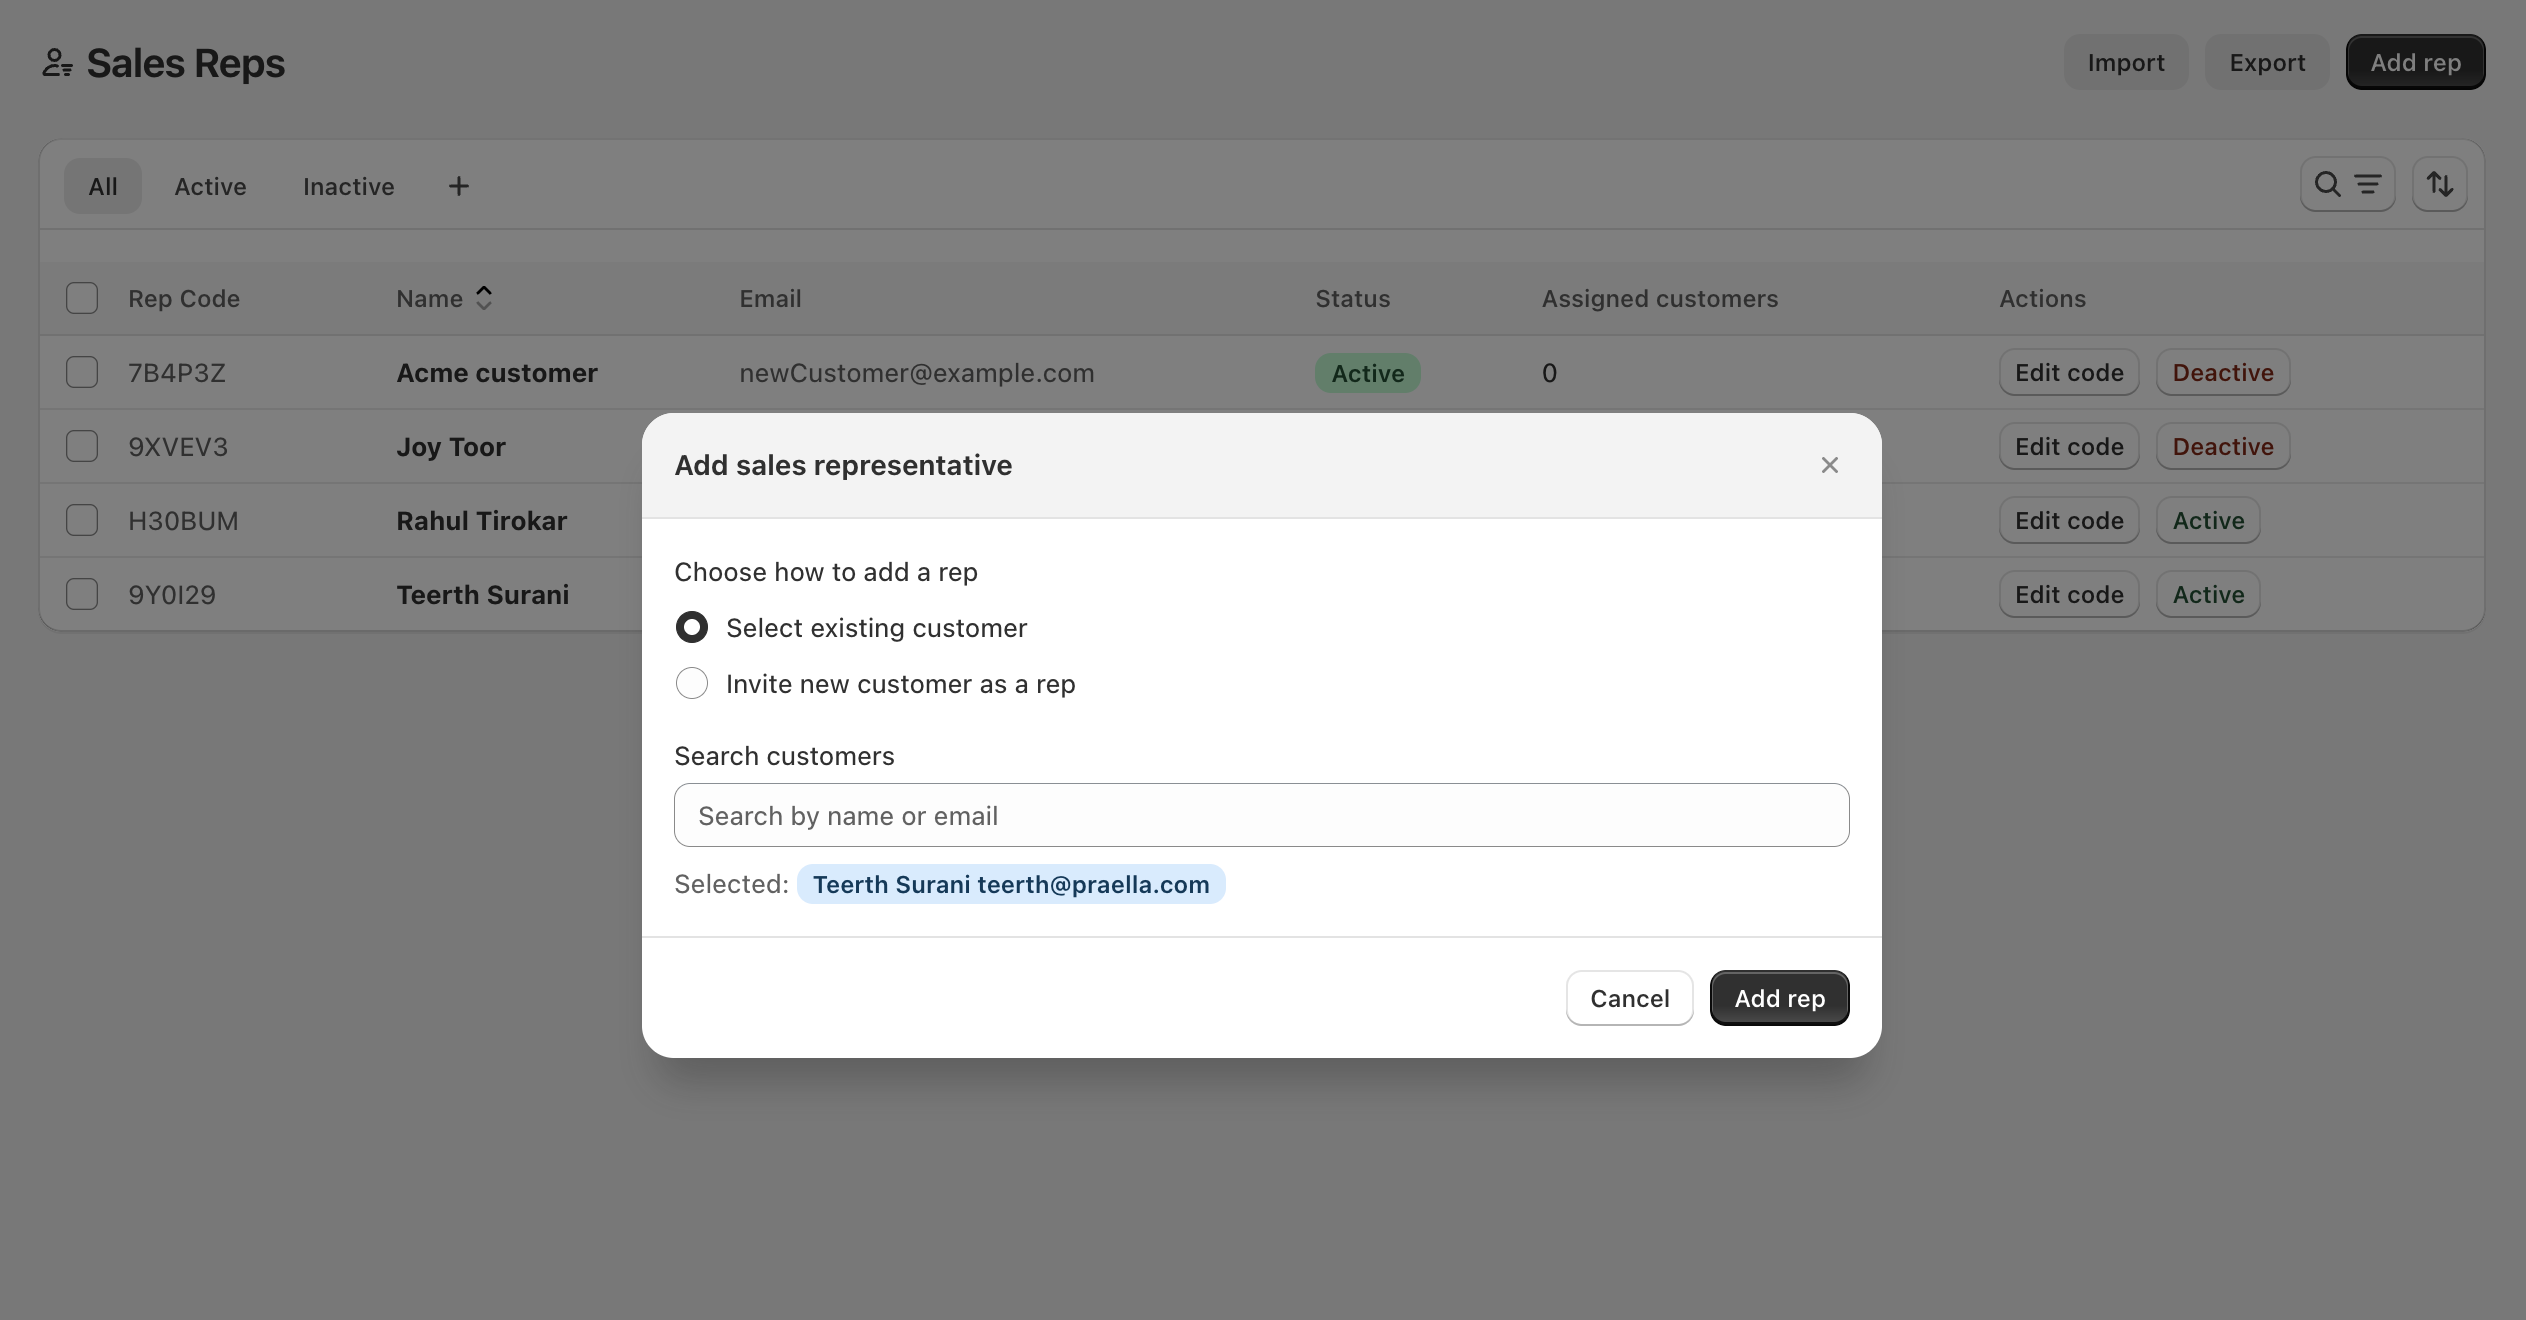
- In the Add sales representative dialog, choose Select existing customer (the first radio option, selected by default).
- In Search customers, type the person's name or email — results update as you type.
- Pick them from the results; the chosen customer appears in a Selected: badge (for example, Teerth Surani teerth@praella.com).
- Confirm the badge shows the correct name and email, then click Add rep.
What happens next: the customer is flagged as a sales rep in B2B Plus and keeps their same Shopify login email. Assign customers or companies from their detail page or Assignments page when ready.
Option 2: Invite a New Customer as a Sales Representative
Use this when the person is not in the store yet — B2B Plus creates their Shopify customer record and marks them as a rep in one step.
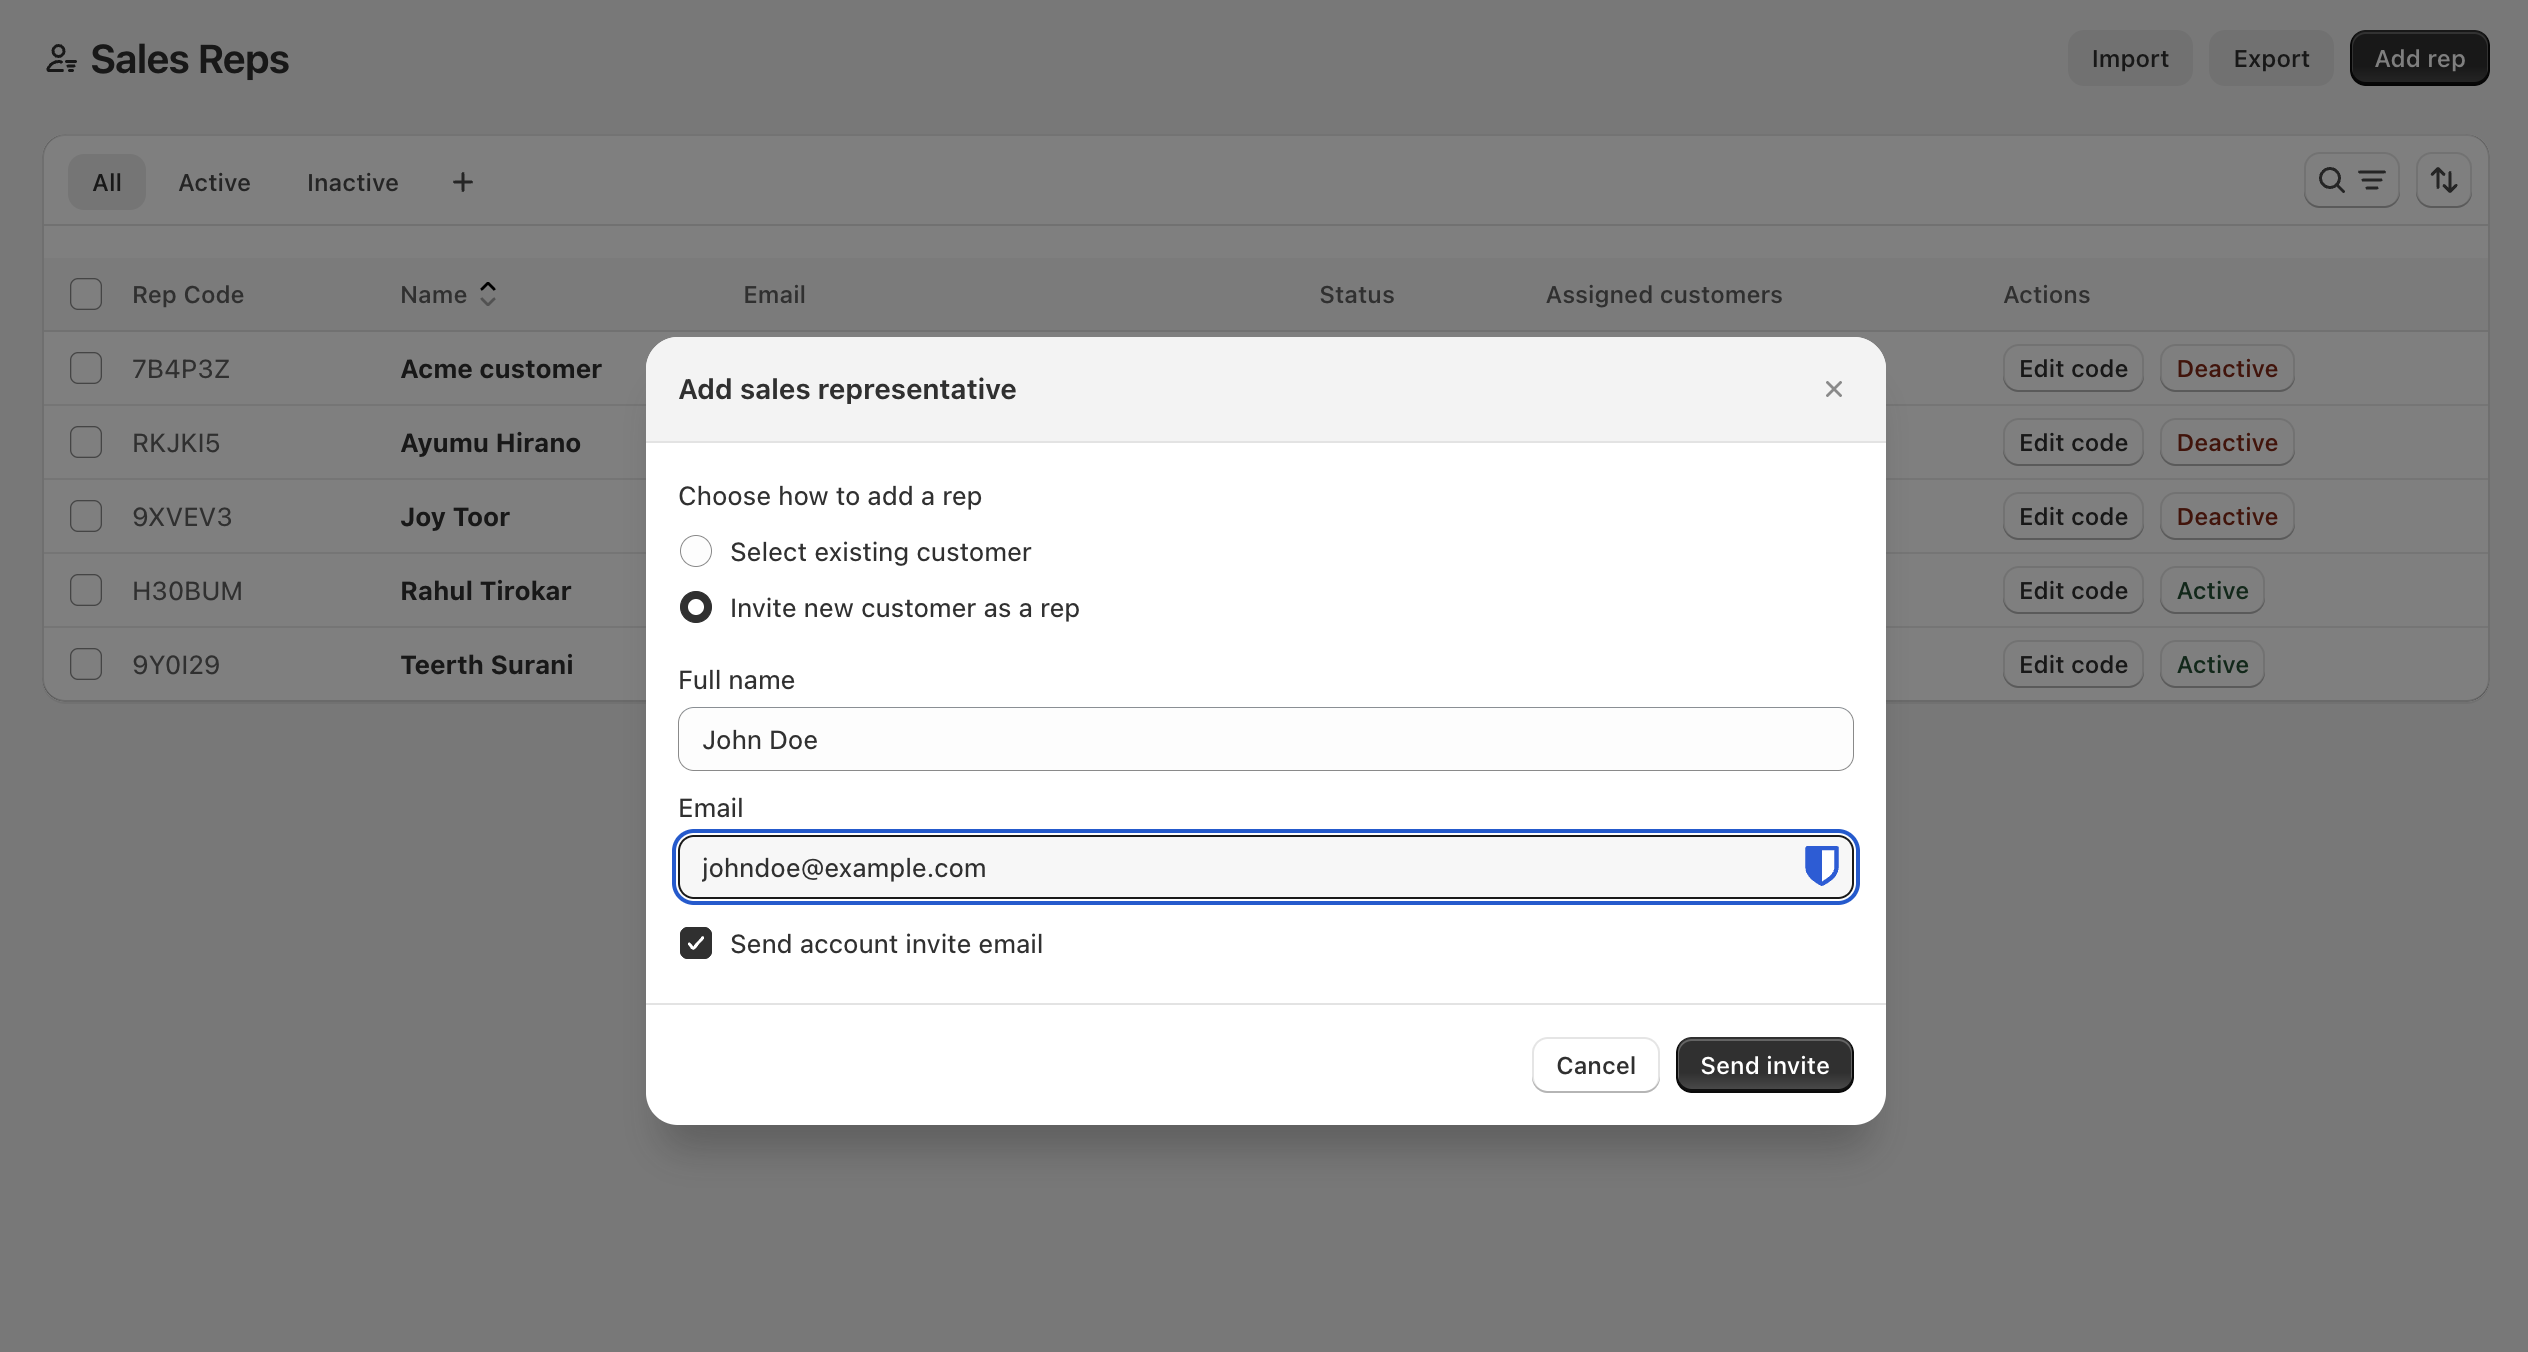
| Field | Notes |
|---|---|
| Full name | How the rep should appear in Admin and on the store, for example John Doe |
| Email address | Required — becomes their Shopify login, for example johndoe@example.com; double-check spelling before sending |
| Send account invite email | Checked by default, so Shopify emails the person a link to activate their account (recommended); uncheck only if you plan to activate the account another way |
In the current Add sales representative dialog, the invite path only collects Full name, Email, and the Send account invite email checkbox — Assign Company and Assign Location are not fields inside this dialog. Company and location assignments for a newly invited rep are made afterward from their Assignments page, the same way as for an existing customer converted to a rep.
Create and invite:
- Automatically create the customer in Shopify — clicking Send invite (or Create rep, if the invite email was unchecked) creates the Shopify customer record.
- Add the customer as a sales representative in B2B Plus — the same action flags that new customer as a rep, so they appear on the Sales reps list immediately, usually as Active.
What happens next: if an invite was sent, the rep must open the email and complete account setup before logging in. Once they can log in, set a rep code and assignments so they can work with the right buyers on the storefront.