Accessing Inventory
Use these steps to open the Inventory module and scope the list to the warehouse you need before viewing, uploading, or editing records.
In this guide:
Opening the Inventory Module
Open Shopify Admin → Apps → B2B Plus → Inventory to reach the inventory list, which is the starting point for every task in this module — viewing, uploading, editing, receiving, adjusting, exporting, and generating purchase orders.
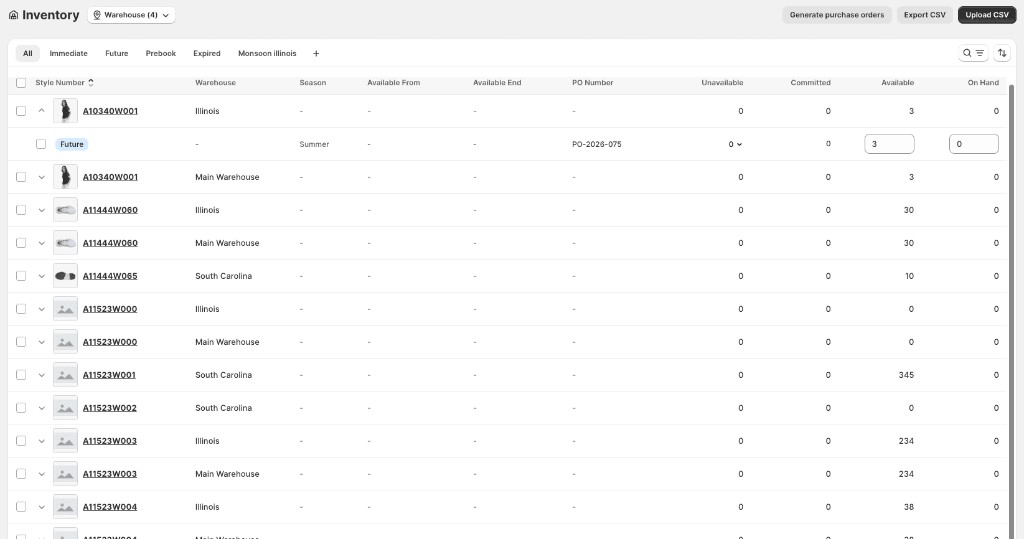
The header includes Generate purchase orders, Export CSV, and Upload CSV. Use the type tabs (All, Immediate, Future, Prebook, Expired) to scope the grid before you search, filter, or edit records.
Selecting a Store Location
Use the Warehouse filter on the Inventory page to scope the visible list to a single location.
CSV upload and CSV export both work across all warehouses at once regardless of the current filter, with the specific location for each row determined by its own Warehouse value; bulk row selection in the table is used only for Delete.